Note
Access to this page requires authorization. You can try signing in or changing directories.
Access to this page requires authorization. You can try changing directories.
Note
This isn't the latest version of this article. For the current release, see the .NET 10 version of this article.
Warning
This version of ASP.NET Core is no longer supported. For more information, see the .NET and .NET Core Support Policy. For the current release, see the .NET 10 version of this article.
This tutorial teaches the basics of building a real-time app using SignalR. You learn how to:
- Create a web project.
- Add the SignalR client library.
- Create a SignalR hub.
- Configure the project to use SignalR.
- Add code that sends messages from any client to all connected clients.
At the end, you'll have a working chat app:

Prerequisites
The latest version of Visual Studio with the ASP.NET and web development workload.


Create a web app project
Start the latest version of Visual Studio and select Create a new project.

In the Create a new project dialog, select ASP.NET Core Web App (Razor Pages), and then select Next.

In the Configure your new project dialog, enter SignalRChat for Project name. It's important to name the project SignalRChat, including matching the capitalization, so the namespaces match the code in the tutorial.
Select Next.
In the Additional information dialog, select .NET 10.0 (Long Term Support) and then select Create.

Add the SignalR client library
The SignalR server library is included in the ASP.NET Core shared framework. The JavaScript client library isn't automatically included in the project. For this tutorial, use Library Manager (LibMan) to get the client library from unpkg. unpkgis a fast, global content delivery network for everything on npm.
In Solution Explorer, right-click the project, and select Add > Client-Side Library.
In the Add Client-Side Library dialog:
- Select unpkg for Provider
- Enter
@microsoft/signalr@latestfor Library. - Select Choose specific files, expand the dist/browser folder, and select
signalr.jsandsignalr.min.js. - Set Target Location to
wwwroot/js/signalr/. - Select Install.

LibMan creates a wwwroot/js/signalr folder and copies the selected files to it. A libman.json file is created with the following code:
{
  "version": "3.0",
  "defaultProvider": "unpkg",
  "libraries": [
    {
      "library": "@microsoft/signalr@latest",
      "destination": "wwwroot/lib/microsoft/signalr/",
      "files": [
        "dist/browser/signalr.js",
        "dist/browser/signalr.min.js"
      ]
    }
  ]
}
Create a SignalR hub
A hub is a class that serves as a high-level pipeline that handles client-server communication.
In the SignalRChat project folder, create a Hubs folder.
In the Hubs folder, create the ChatHub class with the following code:
using Microsoft.AspNetCore.SignalR;

namespace SignalRChat.Hubs
{
    public class ChatHub : Hub
    {
        public async Task SendMessage(string user, string message)
        {
            await Clients.All.SendAsync("ReceiveMessage", user, message);
        }
    }
}
The ChatHub class inherits from the SignalR Hub class. The Hub class manages connections, groups, and messaging.
The SendMessage method can be called by a connected client to send a message to all clients. JavaScript client code that calls the method is shown later in the tutorial. SignalR code is asynchronous to provide maximum scalability.
Configure SignalR
The SignalR server must be configured to pass SignalR requests to SignalR. Add the following highlighted code to the Program.cs file.
using SignalRChat.Hubs;

var builder = WebApplication.CreateBuilder(args);

// Add services to the container.
builder.Services.AddRazorPages();
builder.Services.AddSignalR();

var app = builder.Build();

// Configure the HTTP request pipeline.
if (!app.Environment.IsDevelopment())
{
    app.UseExceptionHandler("/Error");
    // The default HSTS value is 30 days. You may want to change this for production scenarios, see https://aka.ms/aspnetcore-hsts.
    app.UseHsts();
}

app.UseHttpsRedirection();

app.UseRouting();

app.UseAuthorization();

app.MapStaticAssets();
app.MapHub("/chatHub");
app.MapRazorPages()
   .WithStaticAssets();

app.Run();
The preceding highlighted code adds SignalR to the ASP.NET Core dependency injection and routing systems.
Add SignalR client code
Replace the content in Pages/Index.cshtml with the following code:
@page


        User


        Message
The preceding markup:
- Creates text boxes and a submit button.
- Creates a list with
id="messagesList"for displaying messages that are received from the SignalR hub. - Includes script references to SignalR and the
chat.jsapp code is created in the next step.
In the wwwroot/js folder, create a chat.js file with the following code:
"use strict";

var connection = new signalR.HubConnectionBuilder().withUrl("/chatHub").build();

//Disable the send button until connection is established.
document.getElementById("sendButton").disabled = true;

connection.on("ReceiveMessage", function (user, message) {
    var li = document.createElement("li");
    document.getElementById("messagesList").appendChild(li);
    // We can assign user-supplied strings to an element's textContent because it
    // is not interpreted as markup. If you're assigning in any other way, you
    // should be aware of possible script injection concerns.
    li.textContent = `${user} says ${message}`;
});

connection.start().then(function () {
    document.getElementById("sendButton").disabled = false;
}).catch(function (err) {
    return console.error(err.toString());
});

document.getElementById("sendButton").addEventListener("click", function (event) {
    var user = document.getElementById("userInput").value;
    var message = document.getElementById("messageInput").value;
    connection.invoke("SendMessage", user, message).catch(function (err) {
        return console.error(err.toString());
    });
    event.preventDefault();
});
The preceding JavaScript:
- Creates and starts a connection.
- Adds to the submit button a handler that sends messages to the hub.
- Adds to the connection object a handler that receives messages from the hub and adds them to the list.
Run the app
Select Ctrl+F5 to run the app without debugging.
Copy the URL from the address bar, open another browser instance or tab, and paste the URL in the address bar.
Choose either browser, enter a name and message, and select the Send Message button.
The name and message are displayed on both pages instantly.
Tip
If the app doesn't work, open the browser developer tools (F12) and go to the console. Look for possible errors related to HTML and JavaScript code. For example, if signalr.js was put in a different folder than directed, the reference to that file won't work resulting in a 404 error in the console.
 If an
If an ERR_SPDY_INADEQUATE_TRANSPORT_SECURITY error has occurred in Chrome, run the following commands to update the development certificate:
dotnet dev-certs https --clean
dotnet dev-certs https --trust
Publish to Azure
For information on deploying to Azure, see Quickstart: Deploy an ASP.NET web app. For more information on Azure SignalR Service, see What is Azure SignalR Service?.
Next steps
This tutorial teaches the basics of building a real-time app using SignalR. You learn how to:
- Create a web project.
- Add the SignalR client library.
- Create a SignalR hub.
- Configure the project to use SignalR.
- Add code that sends messages from any client to all connected clients.
At the end, you'll have a working chat app:

Prerequisites
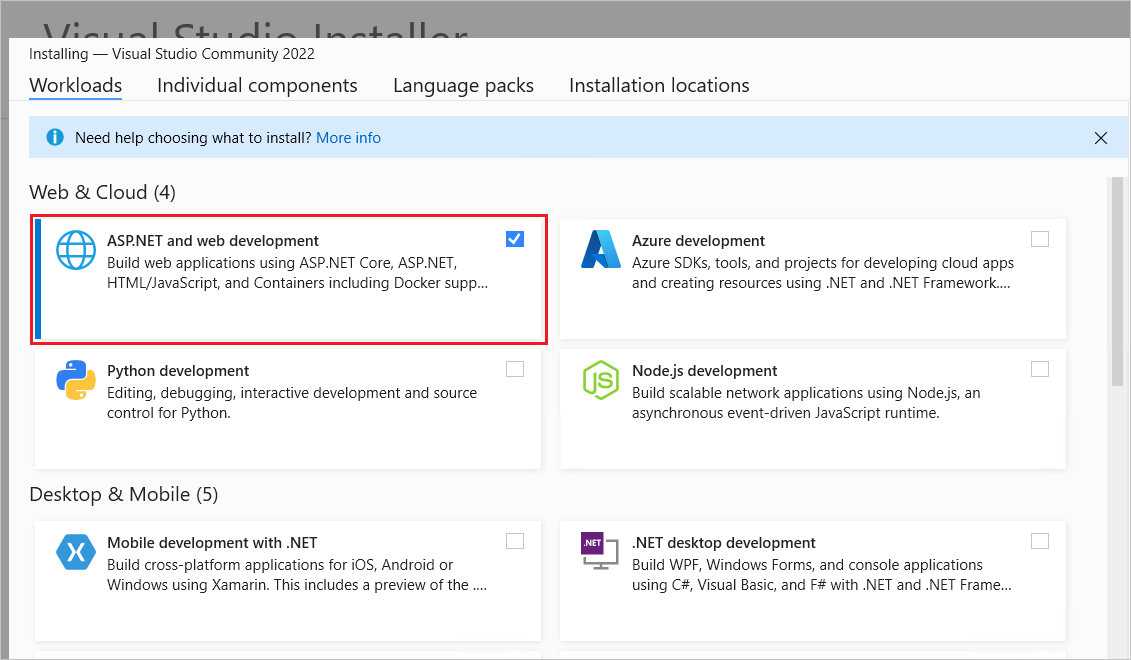
Visual Studio 2022 with the ASP.NET and web development workload.
Create a web app project
Start Visual Studio 2022 and select Create a new project.

In the Create a new project dialog, select ASP.NET Core Web App (Razor Pages), and then select Next.

In the Configure your new project dialog, enter SignalRChat for Project name. It's important to name the project SignalRChat, including matching the capitalization, so the namespaces match the code in the tutorial.
Select Next.
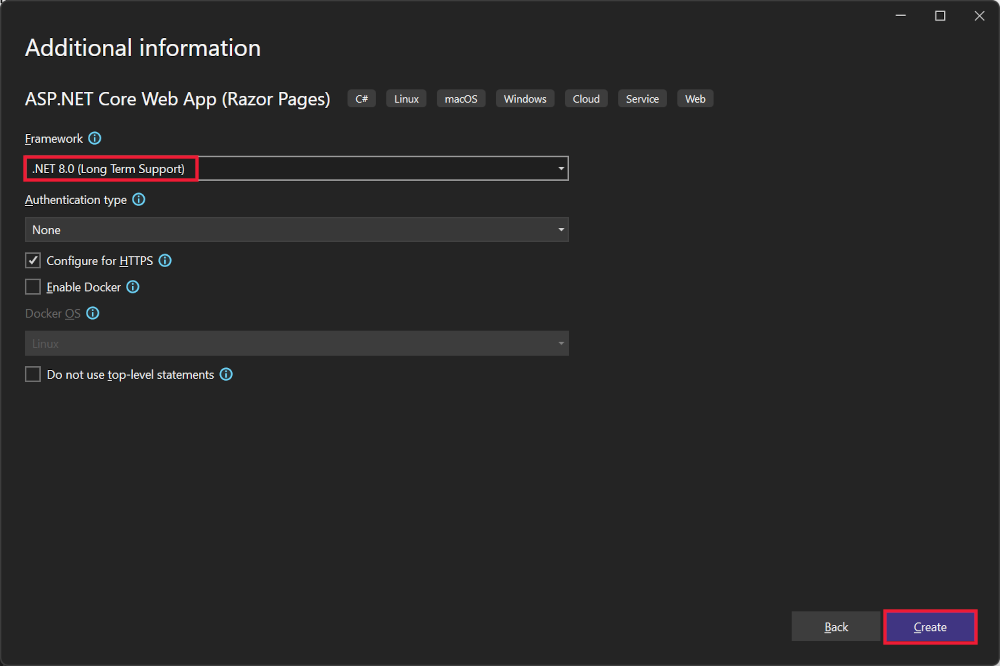
In the Additional information dialog, select .NET 8.0 (Long Term Support) and then select Create.
Add the SignalR client library
The SignalR server library is included in the ASP.NET Core shared framework. The JavaScript client library isn't automatically included in the project. For this tutorial, use Library Manager (LibMan) to get the client library from unpkg. unpkgis a fast, global content delivery network for everything on npm.
In Solution Explorer, right-click the project, and select Add > Client-Side Library.
In the Add Client-Side Library dialog:
- Select unpkg for Provider
- Enter
@microsoft/signalr@latestfor Library. - Select Choose specific files, expand the dist/browser folder, and select
signalr.jsandsignalr.min.js. - Set Target Location to
wwwroot/js/signalr/. - Select Install.

LibMan creates a wwwroot/js/signalr folder and copies the selected files to it.
Create a SignalR hub
A hub is a class that serves as a high-level pipeline that handles client-server communication.
In the SignalRChat project folder, create a Hubs folder.
In the Hubs folder, create the ChatHub class with the following code:
using Microsoft.AspNetCore.SignalR;

namespace SignalRChat.Hubs
{
    public class ChatHub : Hub
    {
        public async Task SendMessage(string user, string message)
        {
            await Clients.All.SendAsync("ReceiveMessage", user, message);
        }
    }
}
The ChatHub class inherits from the SignalR Hub class. The Hub class manages connections, groups, and messaging.
The SendMessage method can be called by a connected client to send a message to all clients. JavaScript client code that calls the method is shown later in the tutorial. SignalR code is asynchronous to provide maximum scalability.
Configure SignalR
The SignalR server must be configured to pass SignalR requests to SignalR. Add the following highlighted code to the Program.cs file.
using SignalRChat.Hubs;

var builder = WebApplication.CreateBuilder(args);

// Add services to the container.
builder.Services.AddRazorPages();
builder.Services.AddSignalR();

var app = builder.Build();

// Configure the HTTP request pipeline.
if (!app.Environment.IsDevelopment())
{
    app.UseExceptionHandler("/Error");
    // The default HSTS value is 30 days. You may want to change this for production scenarios, see https://aka.ms/aspnetcore-hsts.
    app.UseHsts();
}

app.UseHttpsRedirection();
app.UseStaticFiles();

app.UseRouting();

app.UseAuthorization();

app.MapRazorPages();
app.MapHub("/chatHub");

app.Run();
The preceding highlighted code adds SignalR to the ASP.NET Core dependency injection and routing systems.
Add SignalR client code
Replace the content in Pages/Index.cshtml with the following code:
@page


        User


        Message
The preceding markup:
- Creates text boxes and a submit button.
- Creates a list with
id="messagesList"for displaying messages that are received from the SignalR hub. - Includes script references to SignalR and the
chat.jsapp code is created in the next step.
In the wwwroot/js folder, create a chat.js file with the following code:
"use strict";

var connection = new signalR.HubConnectionBuilder().withUrl("/chatHub").build();

//Disable the send button until connection is established.
document.getElementById("sendButton").disabled = true;

connection.on("ReceiveMessage", function (user, message) {
    var li = document.createElement("li");
    document.getElementById("messagesList").appendChild(li);
    // We can assign user-supplied strings to an element's textContent because it
    // is not interpreted as markup. If you're assigning in any other way, you
    // should be aware of possible script injection concerns.
    li.textContent = `${user} says ${message}`;
});

connection.start().then(function () {
    document.getElementById("sendButton").disabled = false;
}).catch(function (err) {
    return console.error(err.toString());
});

document.getElementById("sendButton").addEventListener("click", function (event) {
    var user = document.getElementById("userInput").value;
    var message = document.getElementById("messageInput").value;
    connection.invoke("SendMessage", user, message).catch(function (err) {
        return console.error(err.toString());
    });
    event.preventDefault();
});
The preceding JavaScript:
- Creates and starts a connection.
- Adds to the submit button a handler that sends messages to the hub.
- Adds to the connection object a handler that receives messages from the hub and adds them to the list.
Run the app
Select Ctrl+F5 to run the app without debugging.
Copy the URL from the address bar, open another browser instance or tab, and paste the URL in the address bar.
Choose either browser, enter a name and message, and select the Send Message button.
The name and message are displayed on both pages instantly.
Tip
If the app doesn't work, open the browser developer tools (F12) and go to the console. Look for possible errors related to HTML and JavaScript code. For example, if signalr.js was put in a different folder than directed, the reference to that file won't work resulting in a 404 error in the console.
If an ERR_SPDY_INADEQUATE_TRANSPORT_SECURITY error has occurred in Chrome, run the following commands to update the development certificate:
dotnet dev-certs https --clean
dotnet dev-certs https --trust
Publish to Azure
For information on deploying to Azure, see Quickstart: Deploy an ASP.NET web app. For more information on Azure SignalR Service, see What is Azure SignalR Service?.
Next steps
This tutorial teaches the basics of building a real-time app using SignalR. You learn how to:
- Create a web project.
- Add the SignalR client library.
- Create a SignalR hub.
- Configure the project to use SignalR.
- Add code that sends messages from any client to all connected clients.
At the end, you'll have a working chat app:
Prerequisites
Visual Studio 2022 with the ASP.NET and web development workload.
Create a web app project
Start Visual Studio 2022 and select Create a new project.

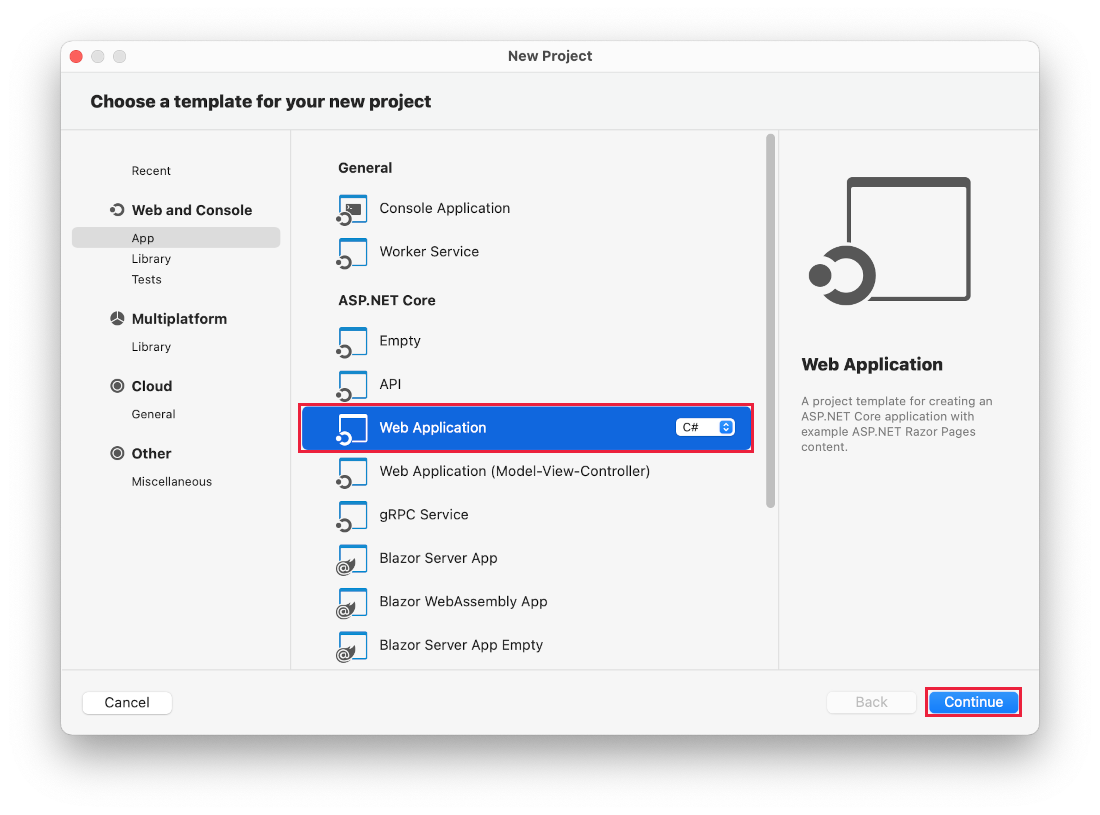
In the Create a new project dialog, select ASP.NET Core Web App, and then select Next.

In the Configure your new project dialog, enter SignalRChat for Project name. It's important to name the project SignalRChat, including matching the capitalization, so the namespaces match the code in the tutorial.
Select Next.
In the Additional information dialog, select .NET 7.0 (Standard Term Support) and then select Create.


Add the SignalR client library
The SignalR server library is included in the ASP.NET Core shared framework. The JavaScript client library isn't automatically included in the project. For this tutorial, use Library Manager (LibMan) to get the client library from unpkg. unpkgis a fast, global content delivery network for everything on npm.
In Solution Explorer, right-click the project, and select Add > Client-Side Library.
In the Add Client-Side Library dialog:
- Select unpkg for Provider
- Enter
@microsoft/signalr@latestfor Library. - Select Choose specific files, expand the dist/browser folder, and select
signalr.jsandsignalr.min.js. - Set Target Location to
wwwroot/js/signalr/. - Select Install.

LibMan creates a wwwroot/js/signalr folder and copies the selected files to it.
Create a SignalR hub
A hub is a class that serves as a high-level pipeline that handles client-server communication.
In the SignalRChat project folder, create a Hubs folder.
In the Hubs folder, create the ChatHub class with the following code:
using Microsoft.AspNetCore.SignalR;

namespace SignalRChat.Hubs
{
    public class ChatHub : Hub
    {
        public async Task SendMessage(string user, string message)
        {
            await Clients.All.SendAsync("ReceiveMessage", user, message);
        }
    }
}
The ChatHub class inherits from the SignalR Hub class. The Hub class manages connections, groups, and messaging.
The SendMessage method can be called by a connected client to send a message to all clients. JavaScript client code that calls the method is shown later in the tutorial. SignalR code is asynchronous to provide maximum scalability.
Configure SignalR
The SignalR server must be configured to pass SignalR requests to SignalR. Add the following highlighted code to the Program.cs file.
using SignalRChat.Hubs;

var builder = WebApplication.CreateBuilder(args);

// Add services to the container.
builder.Services.AddRazorPages();
builder.Services.AddSignalR();

var app = builder.Build();

// Configure the HTTP request pipeline.
if (!app.Environment.IsDevelopment())
{
    app.UseExceptionHandler("/Error");
    // The default HSTS value is 30 days. You may want to change this for production scenarios, see https://aka.ms/aspnetcore-hsts.
    app.UseHsts();
}

app.UseHttpsRedirection();
app.UseStaticFiles();

app.UseRouting();

app.UseAuthorization();

app.MapRazorPages();
app.MapHub("/chatHub");

app.Run();
The preceding highlighted code adds SignalR to the ASP.NET Core dependency injection and routing systems.
Add SignalR client code
Replace the content in Pages/Index.cshtml with the following code:
@page


        User


        Message
The preceding markup:
- Creates text boxes and a submit button.
- Creates a list with
id="messagesList"for displaying messages that are received from the SignalR hub. - Includes script references to SignalR and the
chat.jsapp code is created in the next step.
In the wwwroot/js folder, create a chat.js file with the following code:
"use strict";

var connection = new signalR.HubConnectionBuilder().withUrl("/chatHub").build();

//Disable the send button until connection is established.
document.getElementById("sendButton").disabled = true;

connection.on("ReceiveMessage", function (user, message) {
    var li = document.createElement("li");
    document.getElementById("messagesList").appendChild(li);
    // We can assign user-supplied strings to an element's textContent because it
    // is not interpreted as markup. If you're assigning in any other way, you
    // should be aware of possible script injection concerns.
    li.textContent = `${user} says ${message}`;
});

connection.start().then(function () {
    document.getElementById("sendButton").disabled = false;
}).catch(function (err) {
    return console.error(err.toString());
});

document.getElementById("sendButton").addEventListener("click", function (event) {
    var user = document.getElementById("userInput").value;
    var message = document.getElementById("messageInput").value;
    connection.invoke("SendMessage", user, message).catch(function (err) {
        return console.error(err.toString());
    });
    event.preventDefault();
});
The preceding JavaScript:
- Creates and starts a connection.
- Adds to the submit button a handler that sends messages to the hub.
- Adds to the connection object a handler that receives messages from the hub and adds them to the list.
Run the app
Select Ctrl+F5 to run the app without debugging.
Copy the URL from the address bar, open another browser instance or tab, and paste the URL in the address bar.
Choose either browser, enter a name and message, and select the Send Message button.
The name and message are displayed on both pages instantly.
Tip
If the app doesn't work, open the browser developer tools (F12) and go to the console. Look for possible errors related to HTML and JavaScript code. For example, if signalr.js was put in a different folder than directed, the reference to that file won't work resulting in a 404 error in the console.
If an ERR_SPDY_INADEQUATE_TRANSPORT_SECURITY error has occurred in Chrome, run the following commands to update the development certificate:
dotnet dev-certs https --clean
dotnet dev-certs https --trust
Publish to Azure
For information on deploying to Azure, see Quickstart: Deploy an ASP.NET web app. For more information on Azure SignalR Service, see What is Azure SignalR Service?.
Next steps
This tutorial teaches the basics of building a real-time app using SignalR. You learn how to:
- Create a web project.
- Add the SignalR client library.
- Create a SignalR hub.
- Configure the project to use SignalR.
- Add code that sends messages from any client to all connected clients.
At the end, you'll have a working chat app:

Prerequisites
- Visual Studio 2022 with the ASP.NET and web development workload.
- .NET 6 SDK
Create a web app project
Start Visual Studio 2022 and select Create a new project.

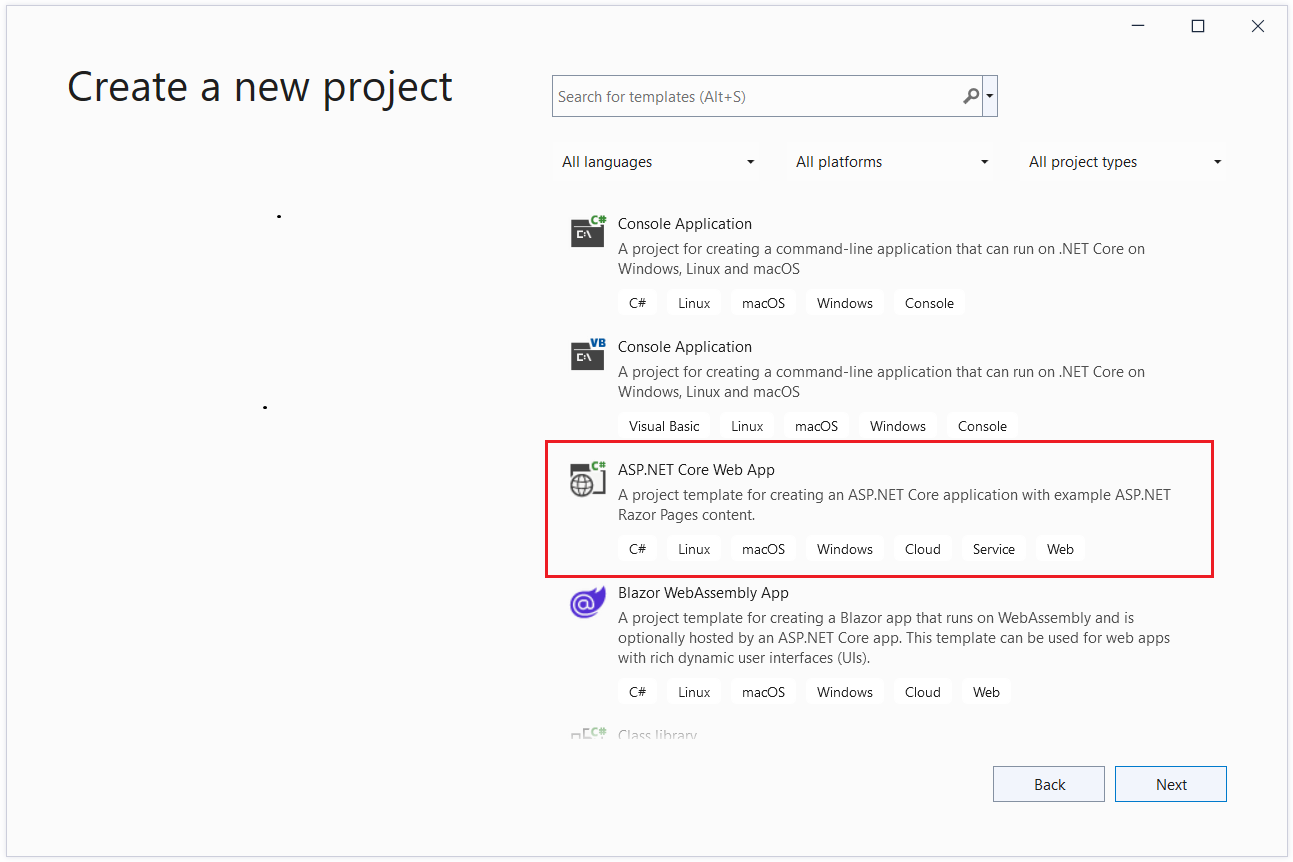
In the Create a new project dialog, select ASP.NET Core Web App, and then select Next.
In the Configure your new project dialog, enter SignalRChat for Project name. It's important to name the project SignalRChat, including matching the capitalization, so the namespaces match the code in the tutorial.
Select Next.
In the Additional information dialog, select .NET 6.0 (Long-term support) and then select Create.


Add the SignalR client library
The SignalR server library is included in the ASP.NET Core shared framework. The JavaScript client library isn't automatically included in the project. For this tutorial, use Library Manager (LibMan) to get the client library from unpkg. unpkgis a fast, global content delivery network for everything on npm.
In Solution Explorer, right-click the project, and select Add > Client-Side Library.
In the Add Client-Side Library dialog:
- Select unpkg for Provider
- Enter
@microsoft/signalr@latestfor Library. - Select Choose specific files, expand the dist/browser folder, and select
signalr.jsandsignalr.min.js. - Set Target Location to
wwwroot/js/signalr/. - Select Install.

LibMan creates a wwwroot/js/signalr folder and copies the selected files to it.
Create a SignalR hub
A hub is a class that serves as a high-level pipeline that handles client-server communication.
In the SignalRChat project folder, create a Hubs folder.
In the Hubs folder, create the ChatHub class with the following code:
using Microsoft.AspNetCore.SignalR;

namespace SignalRChat.Hubs
{
    public class ChatHub : Hub
    {
        public async Task SendMessage(string user, string message)
        {
            await Clients.All.SendAsync("ReceiveMessage", user, message);
        }
    }
}
The ChatHub class inherits from the SignalR Hub class. The Hub class manages connections, groups, and messaging.
The SendMessage method can be called by a connected client to send a message to all clients. JavaScript client code that calls the method is shown later in the tutorial. SignalR code is asynchronous to provide maximum scalability.
Configure SignalR
The SignalR server must be configured to pass SignalR requests to SignalR. Add the following highlighted code to the Program.cs file.
using SignalRChat.Hubs;

var builder = WebApplication.CreateBuilder(args);

builder.Services.AddRazorPages();
builder.Services.AddSignalR();

var app = builder.Build();

if (!app.Environment.IsDevelopment())
{
    app.UseExceptionHandler("/Error");
    app.UseHsts();
}

app.UseHttpsRedirection();
app.UseStaticFiles();

app.UseRouting();

app.UseAuthorization();

app.MapRazorPages();
app.MapHub("/chatHub");

app.Run();
The preceding highlighted code adds SignalR to the ASP.NET Core dependency injection and routing systems.
Add SignalR client code
Replace the content in Pages/Index.cshtml with the following code:
@page


            User


            Message
The preceding markup:
- Creates text boxes and a submit button.
- Creates a list with
id="messagesList"for displaying messages that are received from the SignalR hub. - Includes script references to SignalR and the
chat.jsapp code is created in the next step.
In the wwwroot/js folder, create a chat.js file with the following code:
"use strict";

var connection = new signalR.HubConnectionBuilder().withUrl("/chatHub").build();

//Disable the send button until connection is established.
document.getElementById("sendButton").disabled = true;

connection.on("ReceiveMessage", function (user, message) {
    var li = document.createElement("li");
    document.getElementById("messagesList").appendChild(li);
    // We can assign user-supplied strings to an element's textContent because it
    // is not interpreted as markup. If you're assigning in any other way, you
    // should be aware of possible script injection concerns.
    li.textContent = `${user} says ${message}`;
});

connection.start().then(function () {
    document.getElementById("sendButton").disabled = false;
}).catch(function (err) {
    return console.error(err.toString());
});

document.getElementById("sendButton").addEventListener("click", function (event) {
    var user = document.getElementById("userInput").value;
    var message = document.getElementById("messageInput").value;
    connection.invoke("SendMessage", user, message).catch(function (err) {
        return console.error(err.toString());
    });
    event.preventDefault();
});
The preceding JavaScript:
- Creates and starts a connection.
- Adds to the submit button a handler that sends messages to the hub.
- Adds to the connection object a handler that receives messages from the hub and adds them to the list.
Run the app
Press CTRL+F5 to run the app without debugging.
Copy the URL from the address bar, open another browser instance or tab, and paste the URL in the address bar.
Choose either browser, enter a name and message, and select the Send Message button.
The name and message are displayed on both pages instantly.
Tip
If the app doesn't work, open the browser developer tools (F12) and go to the console. Look for possible errors related to HTML and JavaScript code. For example, if signalr.js was put in a different folder than directed, the reference to that file won't work resulting in a 404 error in the console.
 If an
If an ERR_SPDY_INADEQUATE_TRANSPORT_SECURITY error has occurred in Chrome, run the following commands to update the development certificate:
dotnet dev-certs https --clean
dotnet dev-certs https --trust
Publish to Azure
For information on deploying to Azure, see Quickstart: Deploy an ASP.NET web app. For more information on Azure SignalR Service, see What is Azure SignalR Service?.
Next steps
This tutorial teaches the basics of building a real-time app using SignalR. You learn how to:
- Create a web project.
- Add the SignalR client library.
- Create a SignalR hub.
- Configure the project to use SignalR.
- Add code that sends messages from any client to all connected clients.
At the end, you'll have a working chat app:
Prerequisites
- Visual Studio 2019 16.4 or later with the ASP.NET and web development workload
- .NET Core 3.1 SDK
Create a web app project
- From the menu, select File > New Project.
- In the Create a new project dialog, select ASP.NET Core Web Application, and then select Next.
- In the Configure your new project dialog, name the project SignalRChat, and then select Create.
- In the Create a new ASP.NET Core web Application dialog, select .NET Core and ASP.NET Core 3.1.
- Select Web Application to create a project that uses Razor Pages, and then select Create.

Add the SignalR client library
The SignalR server library is included in the ASP.NET Core 3.1 shared framework. The JavaScript client library isn't automatically included in the project. For this tutorial, you use Library Manager (LibMan) to get the client library from unpkg. unpkg is a content delivery network (CDN) that can deliver anything found in npm, the Node.js package manager.
- In Solution Explorer, right-click the project, and select Add > Client-Side Library.
- In the Add Client-Side Library dialog, for Provider select unpkg.
- For Library, enter
@microsoft/signalr@latest. - Select Choose specific files, expand the dist/browser folder, and select
signalr.jsandsignalr.min.js. - Set Target Location to wwwroot/js/signalr/
- Select Install
LibMan creates a wwwroot/js/signalr folder and copies the selected files to it.
Create a SignalR hub
A hub is a class that serves as a high-level pipeline that handles client-server communication.
- In the SignalRChat project folder, create a Hubs folder.
- In the Hubs folder, create a
ChatHub.csfile with the following code:
using Microsoft.AspNetCore.SignalR;
using System.Threading.Tasks;

namespace SignalRChat.Hubs
{
    public class ChatHub : Hub
    {
        public async Task SendMessage(string user, string message)
        {
            await Clients.All.SendAsync("ReceiveMessage", user, message);
        }
    }
}
The ChatHub class inherits from the SignalR Hub class. The Hub class manages connections, groups, and messaging.
The SendMessage method can be called by a connected client to send a message to all clients. JavaScript client code that calls the method is shown later in the tutorial. SignalR code is asynchronous to provide maximum scalability.
Configure SignalR
The SignalR server must be configured to pass SignalR requests to SignalR.
Add the following highlighted code to the
Startup.csfile.using System; using System.Collections.Generic; using System.Linq; using System.Threading.Tasks; using Microsoft.AspNetCore.Builder; using Microsoft.AspNetCore.Hosting; using Microsoft.AspNetCore.HttpsPolicy; using Microsoft.Extensions.Configuration; using Microsoft.Extensions.DependencyInjection; using Microsoft.Extensions.Hosting; using SignalRChat.Hubs; namespace SignalRChat { public class Startup { public Startup(IConfiguration configuration) { Configuration = configuration; } public IConfiguration Configuration { get; } // This method gets called by the runtime. Use this method to add services to the container. public void ConfigureServices(IServiceCollection services) { services.AddRazorPages(); services.AddSignalR(); } // This method gets called by the runtime. Use this method to configure the HTTP request pipeline. public void Configure(IApplicationBuilder app, IWebHostEnvironment env) { if (env.IsDevelopment()) { app.UseDeveloperExceptionPage(); } else { app.UseExceptionHandler("/Error"); // The default HSTS value is 30 days. You may want to change this for production scenarios, see https://aka.ms/aspnetcore-hsts. app.UseHsts(); } app.UseHttpsRedirection(); app.UseStaticFiles(); app.UseRouting(); app.UseAuthorization(); app.UseEndpoints(endpoints => { endpoints.MapRazorPages(); endpoints.MapHub("/chatHub"); }); } } } These changes add SignalR to the ASP.NET Core dependency injection and routing systems.
Add SignalR client code
Replace the content in
Pages/Index.cshtmlwith the following code:@pageUserMessage
The preceding code:
- Creates text boxes for name and message text, and a submit button.
- Creates a list with
id="messagesList"for displaying messages that are received from the SignalR hub. - Includes script references to SignalR and the
chat.jsapplication code that you create in the next step.
In the wwwroot/js folder, create a
chat.jsfile with the following code:"use strict"; var connection = new signalR.HubConnectionBuilder().withUrl("/chatHub").build(); //Disable send button until connection is established document.getElementById("sendButton").disabled = true; connection.on("ReceiveMessage", function (user, message) { var li = document.createElement("li"); document.getElementById("messagesList").appendChild(li); // We can assign user-supplied strings to an element's textContent because it // is not interpreted as markup. If you're assigning in any other way, you // should be aware of possible script injection concerns. li.textContent = `${user} says ${message}`; }); connection.start().then(function () { document.getElementById("sendButton").disabled = false; }).catch(function (err) { return console.error(err.toString()); }); document.getElementById("sendButton").addEventListener("click", function (event) { var user = document.getElementById("userInput").value; var message = document.getElementById("messageInput").value; connection.invoke("SendMessage", user, message).catch(function (err) { return console.error(err.toString()); }); event.preventDefault(); });The preceding code:
- Creates and starts a connection.
- Adds to the submit button a handler that sends messages to the hub.
- Adds to the connection object a handler that receives messages from the hub and adds them to the list.
Run the app
- Press CTRL+F5 to run the app without debugging.
- Copy the URL from the address bar, open another browser instance or tab, and paste the URL in the address bar.
- Choose either browser, enter a name and message, and select the Send Message button. The name and message are displayed on both pages instantly.
Tip
If the app doesn't work, open your browser developer tools (F12) and go to the console. You might see errors related to your HTML and JavaScript code. For example, suppose you put
signalr.jsin a different folder than directed. In that case the reference to that file won't work and you'll see a 404 error in the console.If you get the error ERR_SPDY_INADEQUATE_TRANSPORT_SECURITY in Chrome, run these commands to update your development certificate:
dotnet dev-certs https --clean
dotnet dev-certs https --trust
Publish to Azure
For information on deploying to Azure, see Quickstart: Deploy an ASP.NET web app.
Next steps
Collaborate with us on GitHub
The source for this content can be found on GitHub, where you can also create and review issues and pull requests. For more information, see our contributor guide.

ASP.NET Core