Spring Boot Sample Application Part 1: Introduction and Configuration
Spring Boot Sample Application Part 1: Introduction and Configuration
This tutorial covers building a bilingual Spring Boot application for a digital library, detailing setup, database integration, and advanced features like caching and error management.
The application built after the completion of this tutorial provides APIs that allow users to manage a digital library.
Users can list all books stored, search any specific book using the filters provided, add new books, update the book's genre, and delete books.
They can also list, add, update, or delete book genres.
Design and Definition
We have the following tables already created in the database.
SQL
CREATE TABLE genre (
    ID INT NOT NULL AUTO_INCREMENT,
    NAME VARCHAR(100) NOT NULL,
    DESCRIPTION VARCHAR(300),
    PRIMARY KEY (ID)
);
SQL
CREATE TABLE book (
    ID INT NOT NULL AUTO_INCREMENT,
    NAME VARCHAR(100) NOT NULL,
    AUTHOR_NAME VARCHAR(100) NOT NULL,
    AUTHOR_SURNAME VARCHAR(100) NOT NULL,
    EDITORIAL VARCHAR(100),
    PRIMARY KEY (ID)
);
SQL
CREATE TABLE book_genres (
    BOOK_ID INT NOT NULL,
    GENRE_ID INT NOT NULL,
    PRIMARY KEY (BOOK_ID, GENRE_ID)
);
In order to provide all functionalities described, we are going to develop 2 APIs in this application, one for books and other for genres management.
Book API
GET /book
GET /book/id/{id}
GET /book?name=XX&author_name=XX&author_surname=XX&editorial=XX&genres=XX
POST /book
DELETE /book
PATCH /book
Genre API
GET /genre
GET /genre/id/{id}
GET /genre?name=XX
POST /genre
PATCH /genre
DELETE /genre
Tutorial Chapters
Now that we have defined what and how we are going to do it, we can divide the work that needs to be done into different tasks.
Each task needs the previous one to be completed because in all of them we are adding bit by bit the complexity needed to provide all requirements asked.
Part 1: Project setup and database configuration. Create the application skeleton, define entities and database configuration.
Part 2: Controller creation and API definitions. Define endpoints and add swagger configuration and annotations.
Part 3: CRUD Service. Develop services for the CRUD operations, map entities to DTO's and inject the services to the controller.
Part 4: Filter and pagination.
Part 5: Spring Cache. Configure cacheable methods with auto-refresh and on-demand cache refresh.
Part 6: Error management and error messages internationalization.
For this tutorial, we are using Spring Boot versión 3.4.0, Java 21 and Maven to build a simple Spring Boot CRUD service using H2 in-memory database.
Here is a full pom.xml functional file with the basic dependencies needed for this tutorial.
XML
4.0.0org.springframework.bootspring-boot-starter-parent3.4.0es.lili.simple.samplesarchetype0.0.1-SNAPSHOTarchetypeArchetype Spring Boot211.6.0.Beta12.7.02.7.00.2.04.2.0org.springframework.bootspring-boot-starterorg.springframework.bootspring-boot-starter-actuatororg.springframework.bootspring-boot-starter-webfluxorg.springframework.bootspring-boot-starter-weborg.springframework.bootspring-boot-starter-validationorg.springframework.cloudspring-cloud-starter-config${spring-cloud-starter-config.version}org.springframework.bootspring-boot-configuration-processortruecom.h2databaseh2runtimeorg.springframework.bootspring-boot-starter-data-jpaorg.springframework.bootspring-boot-starter-cacheorg.projectlomboklomboktrueorg.mapstructmapstruct${mapstruct.version}org.springframework.bootspring-boot-starter-testtestio.projectreactorreactor-testtestorg.springdocspringdoc-openapi-starter-webmvc-ui${springdoc-webmvc.version}org.springdocspringdoc-openapi-starter-webflux-ui${springdoc-webflux.version}org.apache.maven.pluginsmaven-compiler-plugin${java.version}${java.version}org.projectlomboklombok${lombok.version}org.springframework.bootspring-boot-configuration-processororg.mapstructmapstruct-processor${mapstruct.version}org.projectlomboklombok-mapstruct-binding${lombok-mapstruct-binding.version}org.springframework.bootspring-boot-maven-pluginorg.projectlomboklombok
Project Structure
Define the application packages and create empty classes in order to have a skeleton to develop the functionalities defined.
Entities
These are the entities defined for this application.
@Setter
@Getter
@Builder
@Entity
@NoArgsConstructor
@AllArgsConstructor
@Table(name = "genre")
public class GenreEntity {
    @Id
    @GeneratedValue(strategy=GenerationType.AUTO)
    private Long id;
    private String name;
    private String description;
}
BookGenreEntity
Java
@Setter
@Getter
@Builder
@Entity
@NoArgsConstructor
@AllArgsConstructor
@Table(name = "book_genres")
@IdClass(BookGenreEntityPk.class)
public class BookGenreEntity {

    @Id
    @Column(name = "book_id")
    private Long bookId;
    @Id
    @Column(name = "genre_id")
    private Long genreId;
}


@Setter
@Getter
@Builder
@NoArgsConstructor
@AllArgsConstructor
public class BookGenreEntityPk {

    private Long bookId;
    private Long genreId;
}
Configuration
We need to modify our application.yml/application.properties so that Spring JPA autoconfigures and create all the needed beans for the H2 database while starting up.
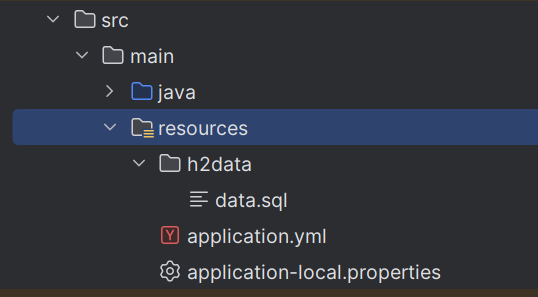
In my case, I have both files. The application.yml file aims to the application-{PROFILE}.properties depending on the spring.profiles.active property.
You can skip this and only have one of the properties files with the values.
The resources folder has the following structure:
application.yml
YAML
spring:
  config:
    import: "optional:configserver:http://localhost:8888/"
  profiles:
    active: ${ACTIVE_PROFILE:local}
  application:
    name: lili-h2-sample
  datasource:
    url: ${env.ds-config.url}
    username: ${env.ds-config.username}
    password: ${env.ds-config.password}
    driverClassName: ${env.ds-config.driver}
  jpa:
    database-platform: ${env.jpa-config.database-platform}
    defer-datasource-initialization: ${env.jpa-config.defer-datasource-initialization}
  #If we add this sql.init properties we MUST have a data.sql file
  #containing SQL sentences to populate the database
  sql:
    init:
      data-locations: ${env.sql-config.init.data-location}
      mode: ${env.sql-config.init.mode}
      platform: ${env.sql-config.init.platform}
  h2:
    console:
      enabled: ${env.h2-config.console.enabled}
      path: ${env.h2-config.console.path}
      settings.trace: ${env.h2-config.console.settings.trace}
      settings.web-allow-others: ${env.h2-config.console.settings.web-allow-others}
application-local.properties
Properties files
env.ds-config.url=jdbc:h2:mem:mydb
env.ds-config.username=sa
env.ds-config.password=sa
env.ds-config.driver=org.h2.Driver

#Defines the file location that will be used to populate the database
env.sql-config.init.data-location=classpath:h2data/data.sql
#Must be true to populate the database and the file specified
#in the property above MUST exist and have valid SQL INSERT sentences.
env.sql-config.init.mode=always
env.sql-config.init.platform=h2

env.jpa-config.database-platform=org.hibernate.dialect.H2Dialect
env.jpa-config.defer-datasource-initialization=true

env.h2-config.console.enabled=true
env.h2-config.console.path=/h2-console
env.h2-config.console.settings.trace=false
env.h2-config.console.settings.web-allow-others=false
When we configure the url, using the :mem: we are indicating we are using in-memory database, this means that all changes in database data during the execution will be lost when the application is stopped.
We can save the changes made during execution using file-embedded configuration. The URL then should look like this.
The file configured in the URL, in this example C:/data/demodb, is where all the database data will be stored.
Properties files
spring.datasource.url=jdbc:h2:file:C:/data/demodb
Database Population
There are different ways to create the tables and schemas needed.
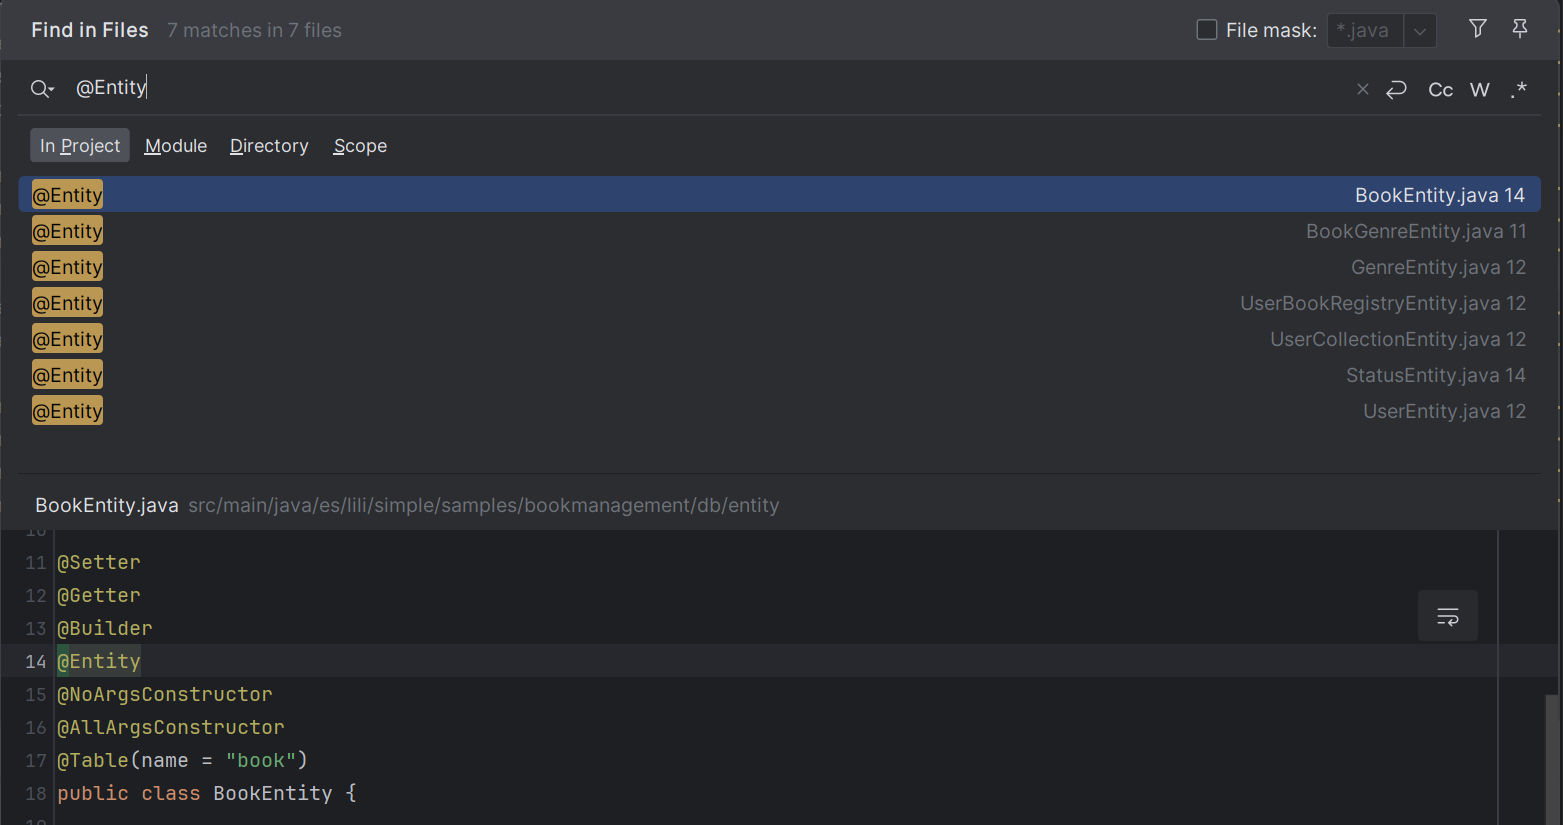
Auto. Classess annotated with @Entity are read during start-up to create the tables in the database.
File configuration. We need a SQL file that contains all creation sentences needed and indicates its location in the properties file.
Console. Once our application is up, we open h2 console and manually create the database schema.
Table Initialization — Auto
In this example, following the properties file provided above, we let Spring automatically create the tables needed in this application.
After our app starts, we can browse our database, accessing the URL configured in the property:
Properties files
spring.h2.console.path: /h2-console
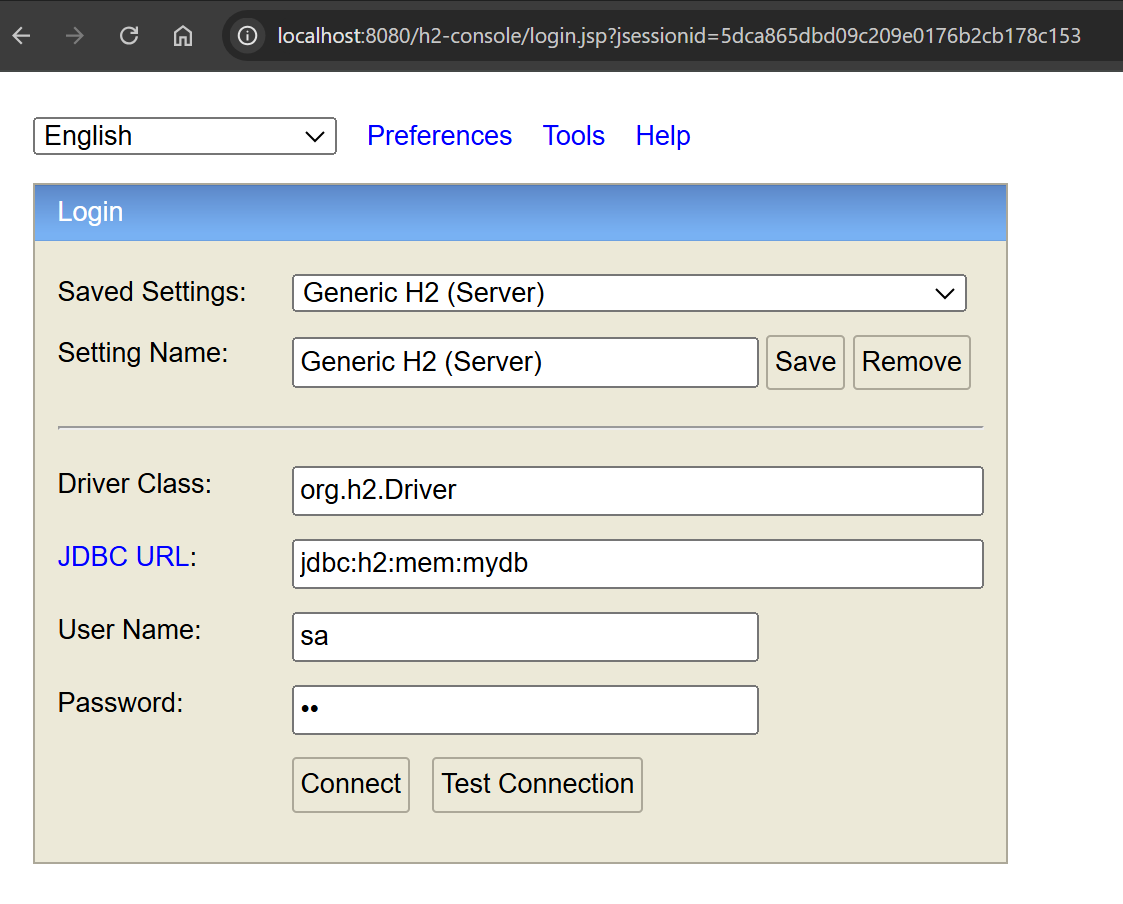
When accessing http://localhost:8080/h2-console this page should appear, where we need to fill in with the same configuration defined in the application properties.
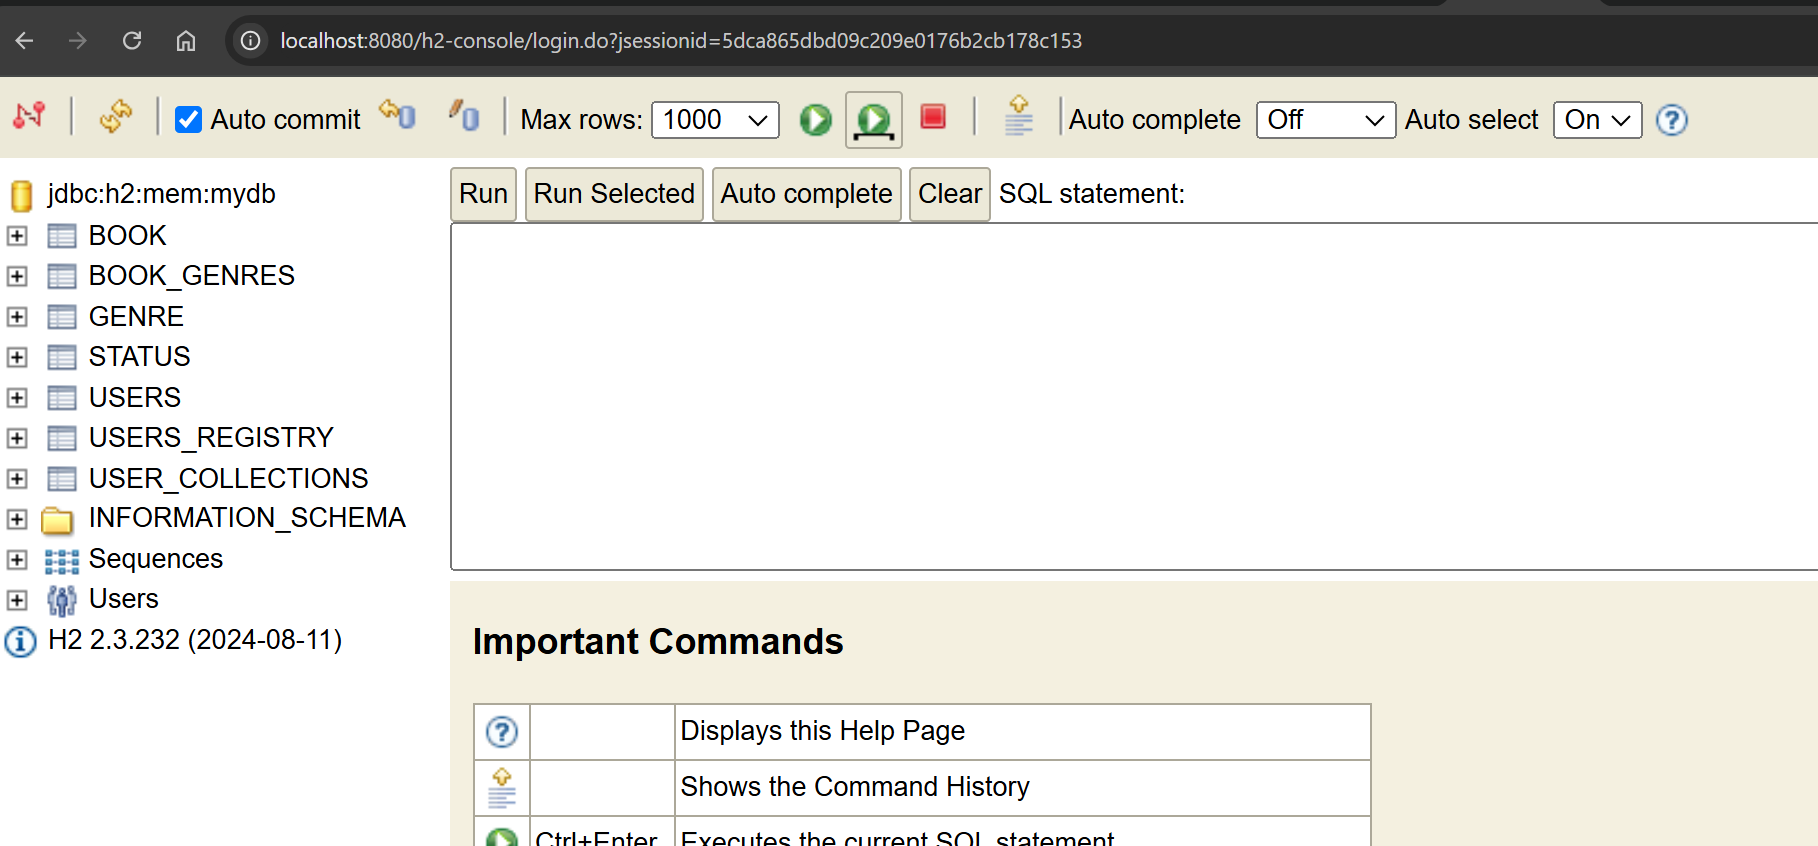
After login, we can see all tables that were created during the start-up and are all the classess we annotated with @Entity.
Following the same configuration provided, the data.sql file MUST exist and have valid SQL sentences to populate the database.
Table Initialization: File Configuration
It's not recommended to have this auto generation at the same time as the file configuration for the creation of the database schema. People have reported lots of errors during creation or tables badly created.
This automatic table generation was possible thanks to the default value of the following property:
Properties files
spring.jpa.hibernate.ddl-auto=create-drop
The create-drop value is set by default and responsible to tell hibernate that when application is started the database should be created and when the application is stopped it should be deleted.
We disable the auto generation, setting the value to none.
Properties files
spring.jpa.hibernate.ddl-auto=none
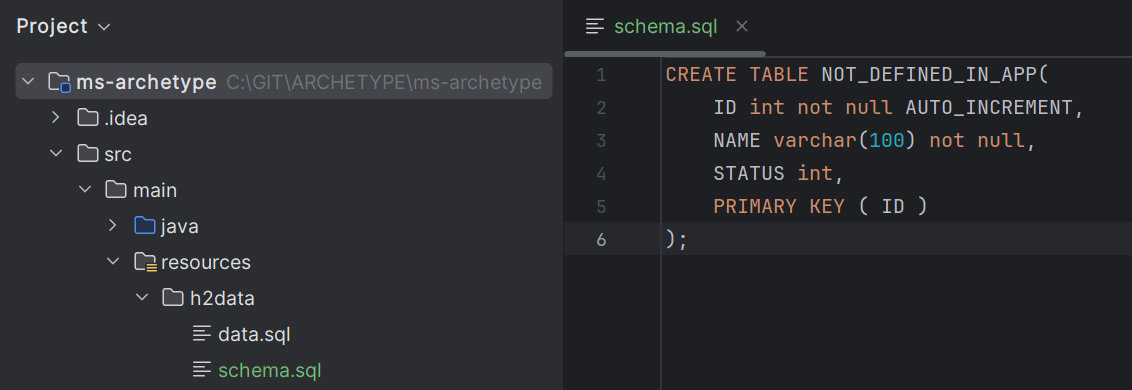
By default, Spring looks for a schema.sql file to generate the database schema, so after the auto is disabled, we add this file in our resources directory.
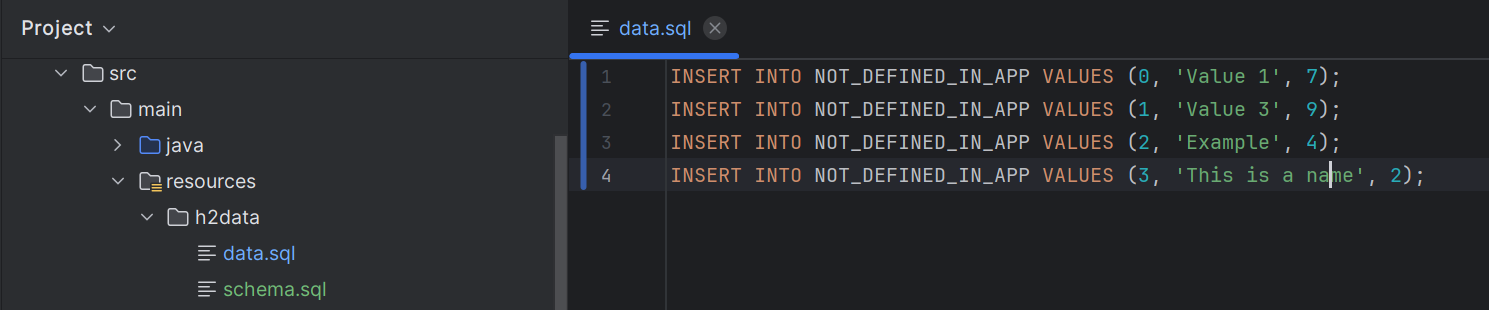
We also need to change the data.sql file to match the database population sql sentences with the new schema provided
Sadly, H2 does not read this schema.sql through Spring Boot resources, so we have to change the jdbc URL to add a script run command.
The full .properties file is as follows after these changes to load the configuration using schema.sql
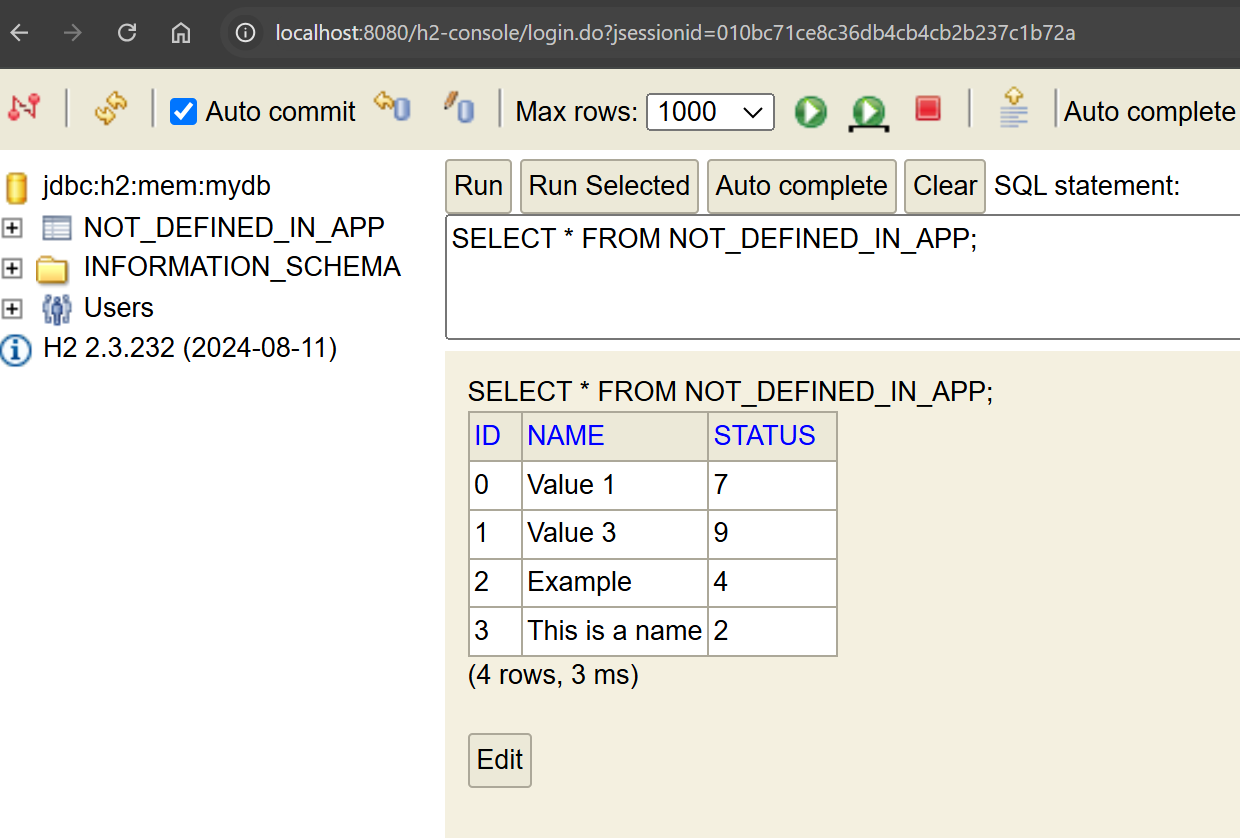
Accesing now to h2 console we see the @Entity classess were ignored, and the table defined in the SQL file is created and populated.
Here, we end the first part of this tutorial. At this point, we only have our application with the minimal configuration required to start and our entities defined.
The full project is located at following Github Repository. Each part of the tutorial is located on its own branch, with the final, completed application available on the 'develop' branch.
DatabaseSpring Bootsql
Opinions expressed by DZone contributors are their own.
Partner Resources
×
Comments
The likes didn't load as expected. Please refresh the page and try again.


 ·
·


Comments