

Claude Code is Anthropic's agentic coding tool that works directly from the terminal. It can read a codebase, propose changes, run commands, and handle Git workflows through natural-language instructions. This guide covers installation, authentication, the first session, everyday commands, practical usage, and troubleshooting.
Prerequisites
- A terminal or command prompt - any will work, although a Unix-style shell such as Terminal, iTerm2, or WSL generally provides the smoothest experience.
- A code project - any existing repository or folder can be used for the first session.
- An account - a Claude Pro, Max, Team, or Enterprise subscription; a Claude Console account; or access through a supported cloud provider such as Amazon Bedrock, Google Cloud, or Microsoft Foundry.
Claude Code CLI Installation
The native installer is the recommended installation path. It does not require Node.js or another runtime and it updates itself automatically in the background.
Step 1: Install the CLI
macOS, Linux, WSL
curl -fsSL https://claude.ai/install.sh | bash
Windows (Powershell)
irm https://claude.ai/install.ps1 | iex
If PowerShell reports that 'irm' is not recognized, you may actually be using CMD. A prompt beginning with C:\> without 'PS' in front indicates CMD.
Windows (CMD)
curl -fsSL https://claude.ai/install.cmd -o install.cmd && install.cmd && del install.cmd

Alternate Installation Options
- Homebrew: claude-code tracks the stable release channel, roughly a week behind and skipping releases with major regressions. claude-code@latest receives new versions as soon as they ship.
brew upgrade Anthropic.ClaudeCode
- WinGet: On Windows, Claude Code can also be installed natively with WinGet. WinGet installations do not auto-update.
winget install Anthropic.ClaudeCode
- Linux package managers: Claude Code can also be installed with apt, dnf, or apk on Debian, Fedora, RHEL, and Alpine.
npm: npm install -g @anthropic-ai/claude-code
Step 2: Log In
Claude Code requires an account. Starting an interactive session prompts you to on first use:
- Run claude command in your terminal.
- Choose the CLI mode (dark, light etc.).
- Add your subscription method.

You can choose any method out of the following:
- Claude Pro, Max, Team, or Enterprise subscription.
- Claude Console account. On first login, it automatically creates a 'Claude Code' workspace for centralized cost tracking.
- Enterprise cloud providers such as Amazon Bedrock, Google's Agent Platform, or Microsoft Foundry.
- A self-hosted Claude apps gateway configured by an administrator.
Once logged in, credentials are stored locally, so you do not need to log in again for every session.
Step 3: Start Your First Session
- Open a project folder in the terminal and st
- art Claude Code:
- The Claude prompt shows the current version, model, and working directory.
- Type /help to see available commands, or /resume to continue a previous conversation.
cd /path/to/your/project
claude
Step 4: Ask Your First Question
- Ask your first question in the Chat box. A good first use is to get oriented in an unfamiliar codebase.
- Claude reads project files as needed, so there is no separate manual step to add context.
- You can also ask about Claude Code's capabilities, for example, 'what can Claude Code do?' or 'can Claude Code work with Docker?
Examples:
what does this project do?
what technologies does this project use?
where is the main entry point?
Step 5: Make Your First Code Change
- You can start making small changes to see the core workflow.
- Claude Code finds the appropriate file, shows the proposed change, asks for approval, and then makes the edit.
- Permission is requested before every write. You can approve changes individually or enable an 'Accept all' mode for the session.
Example:
add a hello world function to the main file
Step 6: Use Git Conversationally
Claude code can also help with common Git operations using natural language requests:
what files have I changed?
commit my changes with a descriptive message
create a new branch called feature/quickstart
help me resolve merge conflicts
Common Claude Commands
Shell commands run from your terminal to start or resume a session, while session commands run after you are already inside Claude Code. The commands below are the ones you are likely to use frequently.
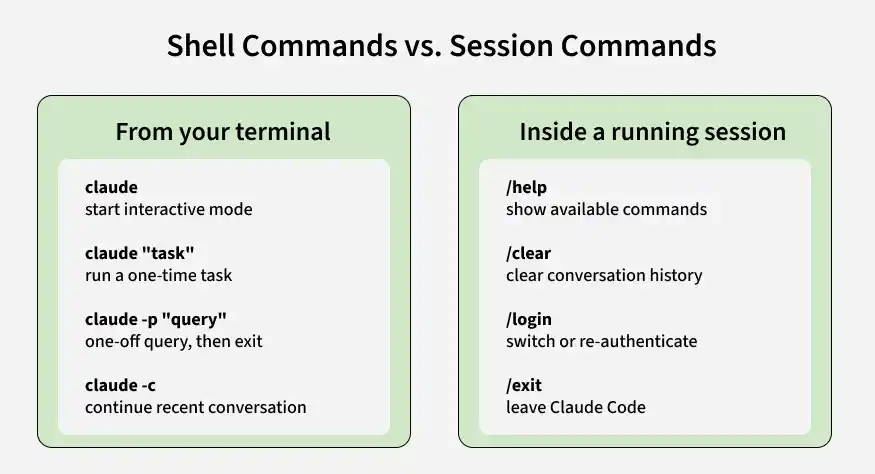
Type | Command | Purpose |
|---|---|---|
Shell | claude | Start interactive mode |
Shell | claude "task" | Run a one-time query |
Shell | claude -p "query: | Run a one-off query, then exit |
Shell | claude -c | Continue a recent conversation |
Session | /help | Show available commands |
Session | /clear | Clear conversation history |
Session | /login | Switch accounts or re-authenticate |
Session | /exit | Leave claude code |
Session | /model | To select or change cladue models |
Best Practices
- Be Specific: "fix the login bug where users see a blank screen after entering wrong credentials" works better than "fix the bug."
- Breakdown large request: Break large requests into numbered steps rather than putting everything into one long paragraph.
- Analyze Codebase: Let Claude explore before it edits. Asking it to "analyze the database schema" first can produce better follow-up changes.
- Create CLAUDE.md: Always create CLAUDE.md file in your codebase, this helps claude to understand your tech stack, restrictions, project directory. Improves response accuracy.